Flashcards
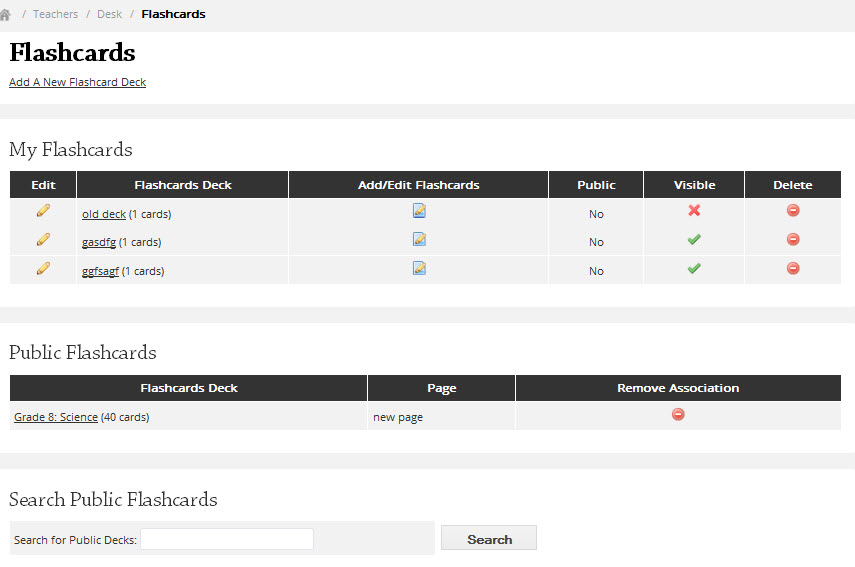
STEP 1: When you first log in to your teacher dashboard to work with your flashcards, you will click on the “Flashcards” link:

After clicking on this link, you will see:
STEP 2: There are two ways to work with your flashcards, search for a public deck or create your own. When you search for a public deck, you are searching the flashcard decks of other SchoolNotes users who have chosen to share their flashcards with you. So what you will need to do is type in a “keyword” you would like to search on, for example Science. Click on the Search button and watch your results appear:
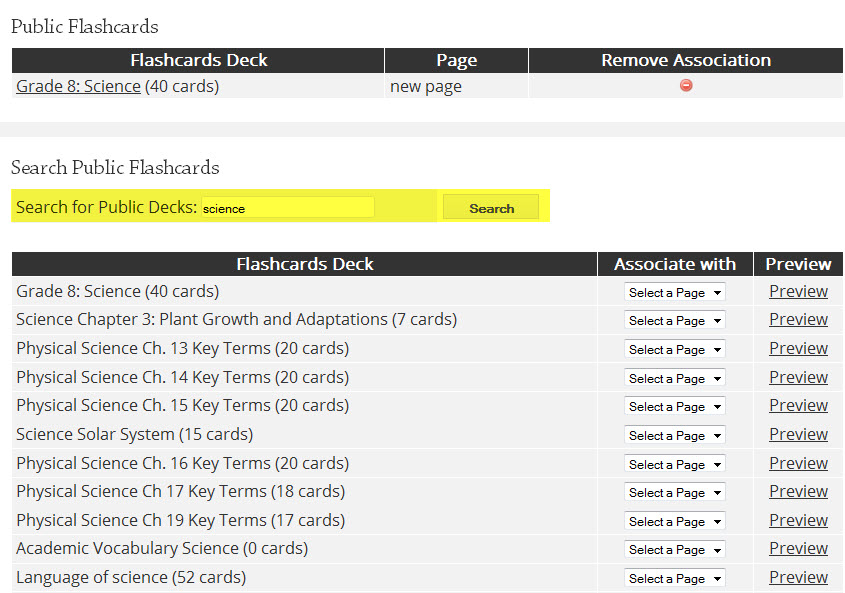
STEP 3: You can click on the preview link to see the flashcards before choosing any public decks to attach to your page. Once you have decided if you want to share this deck, you will select the page you want this flashcard deck to appear on from the drop down menu.
You will then scroll down and click the Save button to save your selections. The flashcards you have chosen to share from other teachers will now appear in your Public Flashcards table:
You will then see the flashcards listed under Public Flashcards.

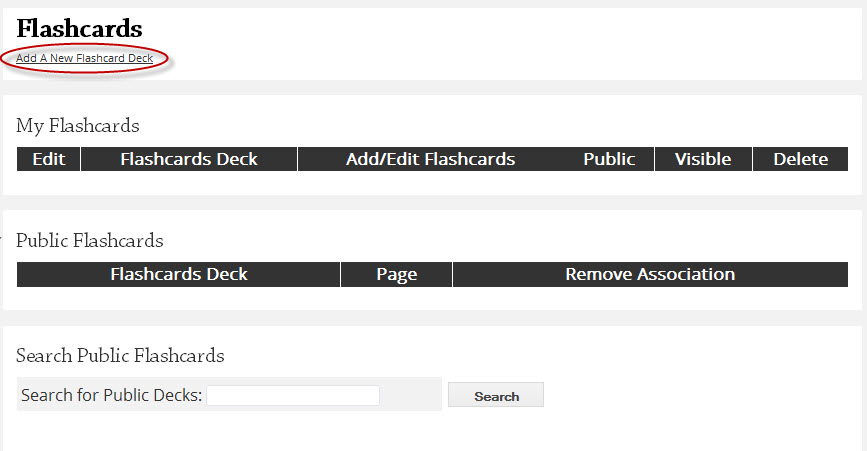
STEP 4: The other option is for you to create your own flashcards deck from new. You can do this by clicking on the Add New Flashcard Deck link:
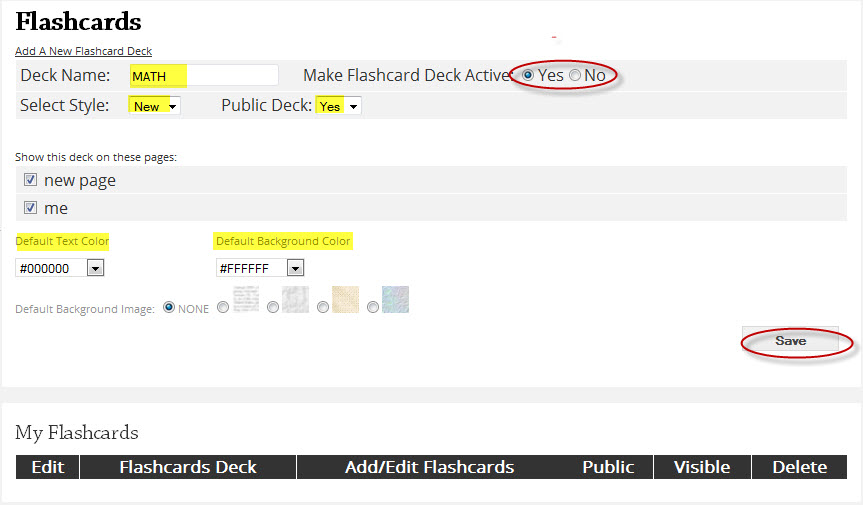
STEP 5: You will then need to fill in the general information about your new flashcard deck. You can also choose a background color and the font color from this menu. You will need to enter in the name of the deck and decide if you want it active (for your students to see) or inactive (for your students not to see). You can also decide if you want your flashcards to look like the flashcards on the old SchoolNotes website or you can choose the new look and feel. I will show you that in a bit. The next thing to determine is if you want to “Share” your flashcards with other teachers by making your deck public (to share) or not public (not to share). Next, click the page name(s) that you wish the flashcards to appear on. Choose a default text color or background if you like and then click “Save.”
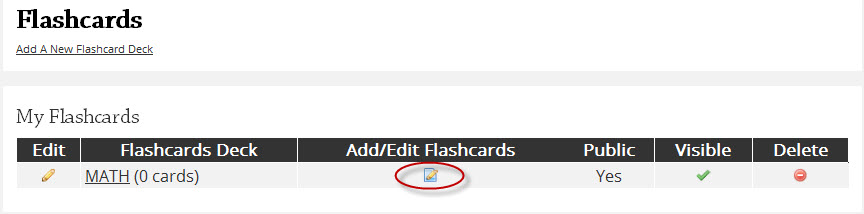
STEP 7: You are now ready for the next step which is making your cards. Click on the “Add/Edit Flaschards” icon in your My Flashcards table and on the next page click on the Add A New Flaschard link. If you have chosen the new style flashcards you will see this: NOTE: Premium account users have the ability to upload an image into flashcards, regular account users will not see this option.
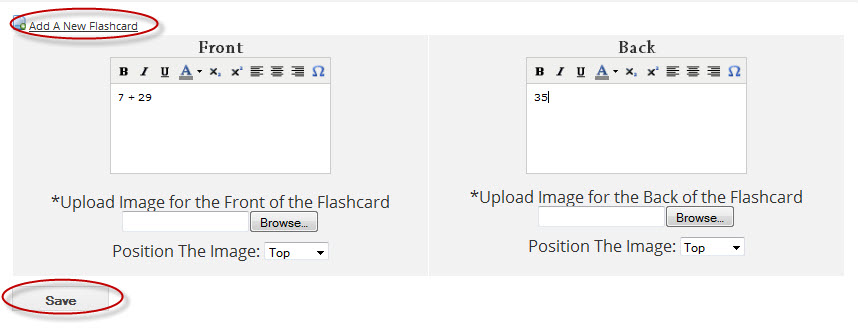
STEP 8: You can change the font you type in using the toolbar provided as well as upload images into your flashcards and choose if you would like the image to show at the top or bottom of the flashcard. Once you have entered everything in to your new flashcard, click save.
You will receive a message that states your flashcard has been created successfully.
STEP 9: To create more flashcards follow the same steps again. To edit or delete the flashcard you have created click the Edit or Delete icons, to move the flashcard in the order it is in click either the up or down arrow and to preview the flashcard click on the Preview icon. Click the View Back link to switch to the back of your card. Select back to Edit to return to your flashcard section.
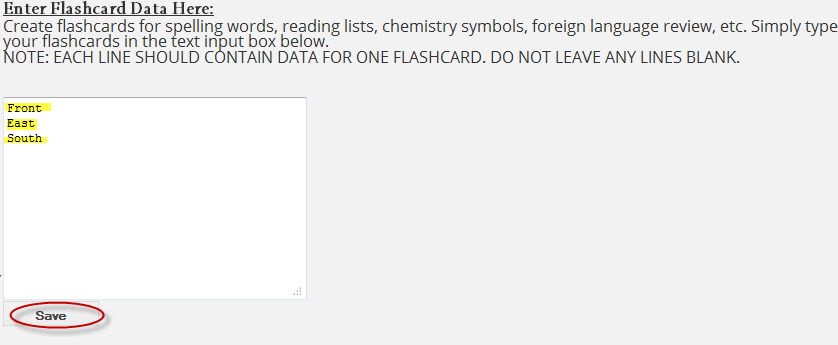
STEP 10: If you choose the old style when you are creating your flashcards you will follow steps 4-8. From here, you will have a different set up for creating your flashcards in your deck. Each line of text you enter creates a new flashcard. When you finish entering in your text, click Save and you will see a save confirmation:
STEP 12: Click on your Flashcards link in the left margin to return to all of your flashcards and then click on the name of your old style flashcards to see what they will look like to your students:
**You are not able to change anything as far as the format of these cards and you are not able to upload any images.
Note: You can also manage your flashcards by clicking on the icon beneath the text editor on your main editing page