Creating a Page and Adding Content
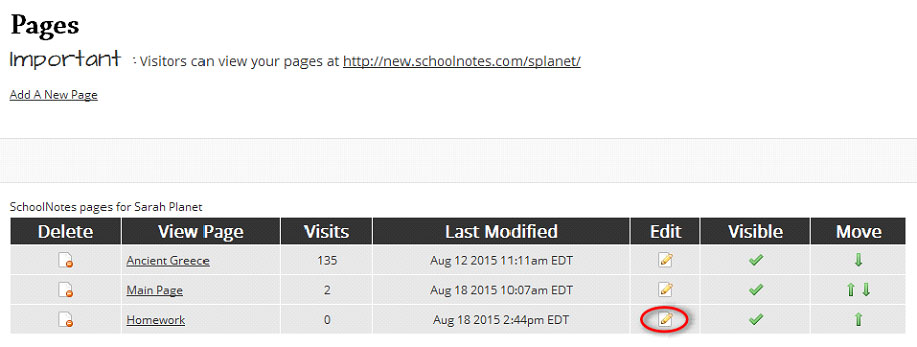
To create a page in your account, click on ‘Pages’ listed in the left margin.
- Select ‘Add a New Page’.

- Enter in a Page title, select ‘Add New Page’, and your page has been created!

Now let’s add some content.
- To add content to your page, select the ‘Edit’ symbol next to the name of the page you want to edit:

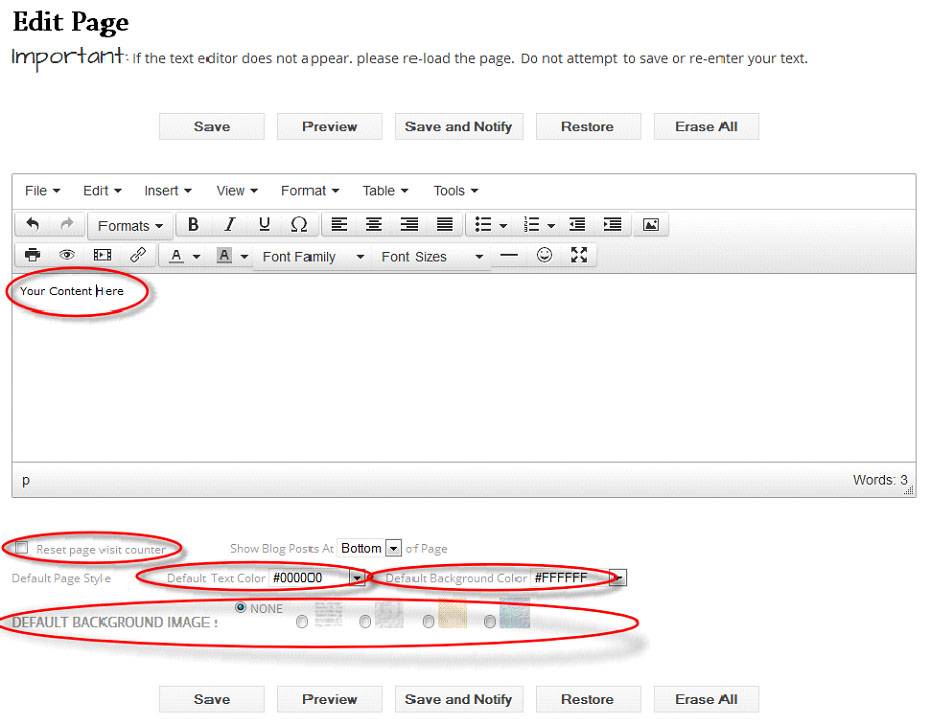
The tabs at the top of your text editor perform the following functions:
- Save- Saves your page update.
- Preview- Preview your update.
- Save and Notify- Saves your page update and notifies those on the notification list assigned to that page that changes have been made.
- Restore- Restores the page to one of five previous save points.
- Erase All- Removes all page content. *When you click this button, all content will disappear immediately. You will only be able to recover it, with the ‘Restore’ feature, if you had saved your page with that content previously.*

*NOTE* Once you have finished editing your page and you wish to send notifications to parents that recent updates have been made, you MUST click on "Save and Notify".
When editing your page, you will find many tools to work with. There is a Text Editing Toolbar similar to what you find in Microsoft Word. With this toolbar you are able to bold1, underline2 and italicize3 your font. There is left4, center5 and right6 justification buttons, bullet lists7 and numbering buttons8 as well as a button to insert images9. We highly recommended you type all of your text into your page and then go back and modify your text using the toolbar. You can change the font color10, highlight your text11, change the font family12 and change the font size13. *Reminder*, when you turn one of the tools on in the toolbar (by clicking on it), it will remain active until you turn it back off. You can also make the editor window full screen14. (You will need to exit this mode to save your work.)

You are now ready to add your content. Feel free to add as much or as little information as you want, the sky’s the limit! You can be as creative or as basic as you would like, it’s up to you.
*Helpful Tip* - We recommend that you ‘Save’ your work as you go. The internet is an unpredictable place and to prevent a loss of work (and a waste of your precious time!) it’s a good idea to ‘Save’ your work periodically while you are drafting your update.

Below the editor window there are additional page formatting tools. You can set a default text color, as well as set a default background color or a background image/pattern.
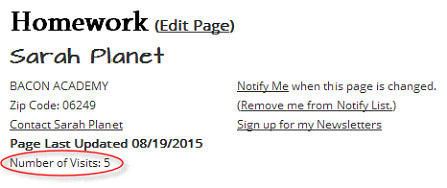
Additionally, one of the features of the site is a page visit counter. This is displayed in the header of each of your pages:

To reset a page’s counter, simply check the box located below the editor window:

*A Note about Pasting*
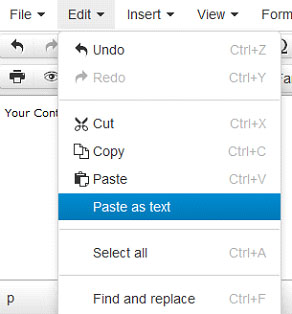
Pasted MS Word content contains a lot of embedded styling that works well in MS Word, but behaves poorly on a website. The best strategy is to paste plain text into the editor and format it with the editor's formatting tools. This can be done by pasting your content into a Notepad document first and then copying and pasting from that document. This will remove the formatting that does not behave properly on the web.
There is also a plain text mode within the editor settings; this will allow you to skip the Notepad step.
This can be found here:

An additional note about the editor, in order to copy/paste/cut you will need to use the standard keyboard shortcut keys- Ctrl+C (copy), Ctrl +V (paste), and Ctrl+X (cut).
The last feature available when creating/editing your pages is the ability to manage your Links, Files, Photo Albums and Flashcards assigned to the page. Simply click the check box for those items you want to feature on that particular page and click ‘Save’.

